TL;DR
- Gentle movement helps scars remodel. Low-load, long-duration stretching and slow yoga reduce tightness and improve glide.
- Start only after your incision is closed and your clinician says it’s okay. Early movement around (not on) the scar is usually fine; direct stretching waits longer.
- Do daily breathwork, light mobility, and short holds (30-60 seconds). Build to 60-90 seconds as comfort grows.
- Pair stretching with silicone (daytime), sunscreen, and brief scar massage (once cleared). This combo works better than any single method.
- Stop and seek care if you see gapping, weeping, fever, sharp pain, or skin color changes that don’t settle.
Scars don’t just change how skin looks-they can limit how you move, breathe, and rest. The good news: your scar keeps remodeling for months, and smart movement can nudge it toward softer, flatter, more comfortable tissue. I’ll show you how to use yoga and stretching to do that-safely, without overdoing it.
Why Yoga and Stretching Help Scars (and What the Science Says)
Scar tissue lays down collagen quickly to close a wound. It’s strong, but at first it’s messy-fibers are disorganized and often stick to nearby layers (think Velcro, not silk). The body then remodels that collagen for 12-18 months. Gentle, repeated loading tells those fibers how to line up. That’s where yoga and stretching shine.
How it helps:
- Low-load, long-duration stretch aligns collagen. Holding a comfortable stretch for 30-90 seconds, repeated over weeks, improves pliability and glide.
- Movement boosts blood and lymph flow, which brings nutrients in and waste out. Better flow, calmer itch and pain.
- Breathwork downshifts the stress response. Lower sympathetic tone can reduce pain sensitivity and muscle guarding around the scar.
- Slow, mindful motion helps the nervous system update its “map” of the area, easing protective stiffness.
Evidence snapshot (plain language):
- Scar massage: trials and clinical guidelines generally show improved pliability, itch, and pain when started after full closure and done gently. Plastic surgery and burn rehab groups endorse it with silicone.
- Stretching/mobilization: rehab literature supports low-load, frequent stretching to improve tissue length and motion after surgery or injury.
- Yoga: studies in post-surgical populations (e.g., breast cancer) show better shoulder range, less pain, and better quality of life when yoga is added to care. For scars specifically, yoga acts as a smart delivery system for safe movement, breathwork, and gentle load.
Bottom line: consistent, gentle practice matters more than heroic effort. Think “nudges” to guide collagen, not “forcing” tissue to change.
When to Start, What to Avoid, and Simple Safety Rules
Every scar has a timeline. When in doubt, ask your surgeon, OB-GYN, dermatologist, or physical/occupational therapist. Use these rules of thumb:
- Fresh surgical scar (first 2-3 weeks): keep it clean and protected. Walk and breathe normally. Move areas AROUND the scar without pulling on it. No direct stretching on the scar yet.
- Closed incision with no scabs (often 2-6 weeks, varies): you can usually start gentle scar massage and light stretching near the area if your clinician clears you. Start small.
- Abdominal/pelvic surgeries (C-section, hernia repair): clearance often lands around 6 weeks for light core-friendly movement and very gentle abdominal lengthening. Deep twists, big backbends, and strong core work come later (8-12+ weeks), with medical clearance.
- Joint surgeries (knee, shoulder, hip): range-of-motion work typically starts early under guidance. Your yoga and stretches should follow the surgeon’s and therapist’s protocol.
- Burns, skin grafts, radiation skin: get direct guidance from a burn therapist or radiation team. Protection from heat and friction lasts longer here.
Red flags-pause and call your clinician if you see:
- Incision gapping, bleeding, or any weeping/fluid.
- Fever, spreading redness, warmth, or a bad smell.
- Sharp, escalating pain during or after stretching.
- Numbness or tingling that worsens or lingers.
Smart-load rules (so you don’t make it angrier):
- Intensity: gentle to moderate tension only. Hold at 3-4/10 stretch sensation, not pain.
- After-feel: slight pinkness that fades in 10-20 minutes is okay; redness lasting an hour means you did too much.
- Surface care: daily SPF 30+ on exposed scars; avoid hot yoga, saunas, and aggressive friction early on.
- Tension control: high skin tension can push scars toward hypertrophy. Offload with silicone sheets or hypoallergenic tape during the day if your clinician recommends it.
Special note on keloid-prone skin: stretching won’t shrink a keloid, but it can reduce stiffness around it. Keep loads low, protect from tension and friction, and talk to a dermatologist about silicone, pressure therapy, or injections.
A Gentle 4‑Week Yoga + Stretch Plan (With Modifications by Scar Type)
Practice 5-6 days/week. Sessions are 15-30 minutes. Breathe slow and steady. If your surgeon or therapist gave you a protocol, keep that as your north star and weave these in only if they fit.
Daily warm-up (5 minutes)
- 360° breathing: lie on your back, one hand on ribs, one on low belly. Inhale through the nose, expand ribs/back, soft belly rise. Exhale slowly. 10 breaths.
- Cat-Cow: on hands and knees, slow spinal flex/extend. 1-2 minutes.
- Ankle pumps and wrist circles: 30 seconds each to wake up lymph flow.
Core sequence (choose the track that matches your scar location):
Track A: Abdominal/C‑section
- Supported constructive rest: knees bent, feet down, neutral spine. 1 minute of easy breath.
- Pelvic tilts: tiny rocks, pain-free. 10-15 reps.
- Supine side stretch: clasp hands overhead, gently reach to the right for 3-5 breaths, then left. 2 rounds.
- Sphinx (very low): elbows under shoulders or slightly forward, belly relaxed. 30 seconds, up to 2 rounds. Skip if you feel pulling on the incision.
- Child’s pose with side reach: hips back, walk hands to the right, then left. 30-45 seconds each side.
Track B: Shoulder/chest (breast surgery, chest ports, mastectomy-only with clearance)
- Doorway pec stretch: forearm on doorframe, step through gently. 30-45 seconds, 2 rounds each side.
- Thread the Needle: from hands/knees, slide one arm under, rest head. 30-45 seconds each side.
- Cow Face arms (use strap): reach one arm up, the other down with a strap. Keep neck easy. 20-30 seconds per side.
- Wall slides: back of forearms on wall, slide up/down within comfort. 10 slow reps.
Track C: Knee/hip
- Heel slides: on back, bend and straighten one knee. 10-15 easy reps each side.
- Hamstring strap stretch: keep a soft knee, don’t yank. 30-45 seconds, 2 rounds each side.
- Figure‑4 glute stretch (or seated version): 30-45 seconds each side.
- Quad stretch with strap (side‑lying or prone with clearance): 20-30 seconds each side.
All tracks: Finish with circulation + calm
- Legs up the wall (or legs on a chair): 2-4 minutes, slow breaths.
- Box breathing: inhale 4, hold 4, exhale 6, hold 2. 6-8 rounds.
Progressions by week (adjust slower if your body asks for it)
- Week 1: short holds (20-30 seconds), more breaths, no end‑range pushes. Focus on ritual and consistency.
- Week 2: build holds to 45-60 seconds; add gentle thoracic rotation (open book) and calf stretches for walk comfort.
- Week 3: extend a few holds to 75-90 seconds if fully comfortable; add supported bridge (low lift, 20-30 seconds) for front‑body length if cleared.
- Week 4: sprinkle in light functional moves: sit‑to‑stand reps, gentle wall planks (10-20 seconds), or low lunge with blocks. Still pain‑free and slow.
Modifications for common scars
- C‑section: use a folded blanket under the belly in Child’s pose; skip big backbends for now. Support with a soft belly band if your provider okays it.
- Breast/chest: keep arms below shoulder height early; props are your best friend. If you had lymph nodes removed, elevate and do fist open/close to help lymph return.
- Knee: pad under kneecaps in kneeling; favor chair‑based versions until kneeling is comfy.
- Wrist/hand: practice fist‑to‑open cycles, prayer stretch, and gentle tendon glides. Keep force low but frequent.
How to tell it’s working
- More glide: your fingers can move the skin side‑to‑side more easily.
- Less itch and tug during daily moves.
- Better reach/stride without bracing or holding your breath.
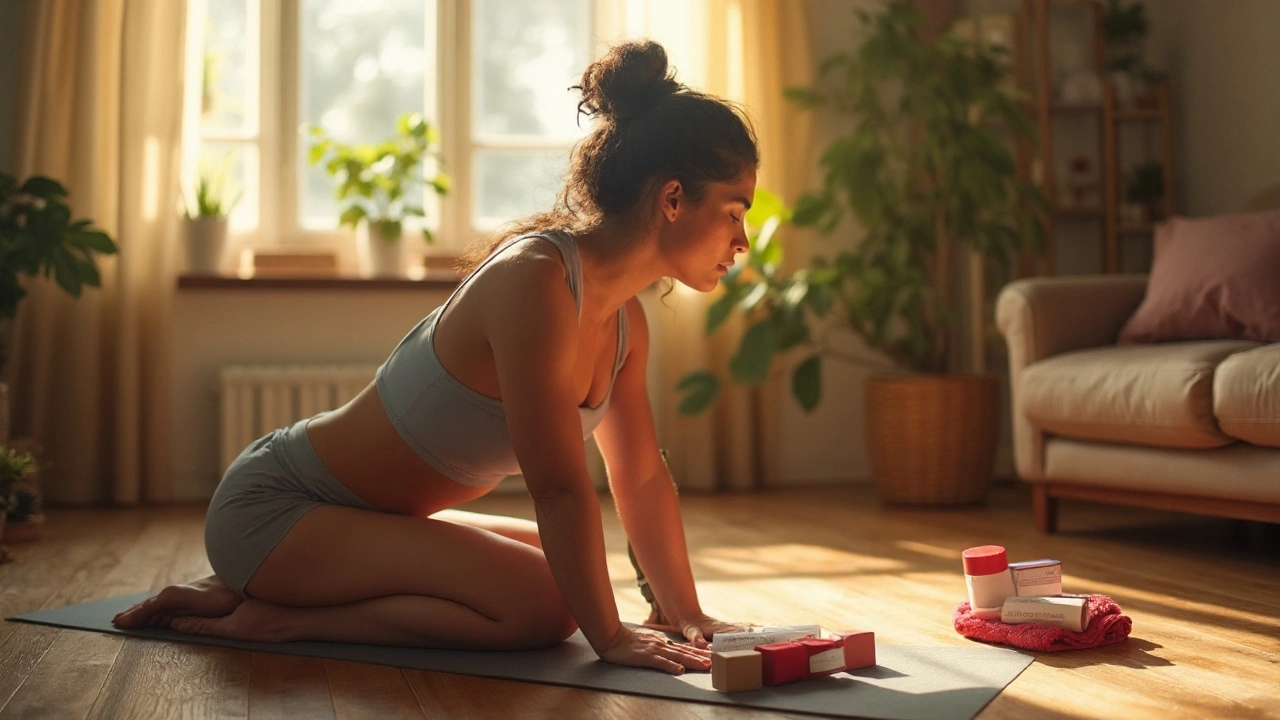
Scar Massage, Tools, and Add‑Ons That Boost Results
Massage and topical care amplify your movement practice. Wait for your clinician’s green light-usually after the incision is fully closed and dry.
Scar massage basics (3-7 minutes, 1-2x/day)
- Warm hands. Use a simple lotion or silicone gel; avoid heavy fragrance.
- Skin glide test: gently try to move the skin north/south, east/west. No forcing.
- Small circles: fingertip circles along the scar, then just above and below it. Light to moderate pressure.
- Cross‑friction: if okayed, short side‑to‑side strokes across the line of the scar. 30-60 seconds.
- Hold‑and‑breathe: find a snug spot, hold it, take 3 slow breaths, then release.
What to pair with massage
- Silicone gel/sheets: daytime wear helps flatten and soften. This is one of the most supported options in scar care guidelines.
- Sunscreen: daily SPF 30+ on exposed scars for 12-18 months. UV darkens scars.
- Hydration: well‑hydrated skin tolerates stretch better. Water and a bland moisturizer help.
- Taping to offload: hypoallergenic tape can reduce edge tension in high‑movement areas. Ask for a quick demo from a PT or nurse.
Tools and when to use them
- Soft ball (tennis or foam): for surrounding muscles, not directly on brand‑new scars.
- Foam roller: light rolling on adjacent areas, not on a tender, new incision.
- Cupping and scraping: skip on new scars. If you ever try them, wait until the scar is mature and get professional guidance.
Heat and cold: early heat can inflame; intense cold can slow healing. If you use either, keep it brief and gentle, and never directly on a fresh scar.
A quick word on expectations: collagen remodeling is slow. Most people notice better softness, itch relief, and mobility within 6-8 weeks of steady practice. Cosmetic fading takes longer and may also need silicone, time, and sometimes in‑office treatments.
Checklists, Mini‑FAQ, and Next Steps
Session checklist (print or save)
- Green light? Your clinician cleared you to move and your incision is closed.
- Room setup: calm space, props (blocks/strap/blanket), water, timer.
- Warm‑up: 360° breathing, Cat-Cow, gentle joint circles.
- Targeted stretches: 3-6 poses, 30-60 seconds each. No pain, no strain.
- Cool‑down: legs up the wall, slow exhale breathing.
- Aftercare: silicone or moisturizer, brief scar massage if cleared, SPF if exposed.
Weekly rhythm
- 5-6 short sessions beat 1 long one.
- Increase hold times by 10-15 seconds only when it feels easy.
- Track 3 wins: easier reach, less tug, better sleep. Write them down.
Pitfalls to avoid
- Stretching into pain or holding your breath.
- Skipping sun protection and then wondering why the scar looks darker.
- Doing heat, deep twists, or heavy core work too soon after abdominal surgery.
- Rubbing the scar raw. Gentle, brief, consistent beats hard and long.
Mini‑FAQ
- Will yoga erase my scar? No. It can improve pliability, comfort, and how it moves with you. Appearance may improve, but the main win is function and feel.
- Can stretching make a scar worse? Too‑early or aggressive stretching can widen a scar or flare it. Keep intensity low, progress slowly, and watch how the skin looks after.
- What about keloids? Yoga won’t flatten a keloid, but it helps surrounding tightness. Combine movement with silicone and see a dermatologist for targeted treatments.
- How soon can I do hot yoga? Wait at least 12 weeks and only after clearance. Heat increases blood flow and swelling-great later, not early.
- Do oils help? They can reduce friction for massage, but silicone is better supported for shaping. Choose simple, fragrance‑free products if your skin is sensitive.
- Acne scars? Yoga won’t change pitted acne scars directly. It can lower stress and improve sleep (good for skin), but texture changes usually need procedures like microneedling or lasers.
- How long until I feel a difference? Many people feel easier movement and less itch in 2-4 weeks, with more noticeable softness by 6-8 weeks of steady practice.
Next steps by scenario
- Fresh post‑op and nervous: start with breathwork, Cat-Cow, and walking. Book one session with a physical therapist for a custom plan.
- Stiff shoulder after breast surgery: add doorway stretch, thread‑the‑needle, and wall slides. Keep holds short and frequent.
- Knee scar pulling when you bend: heel slides, hamstring strap stretch, and figure‑4 glutes. Short, daily doses.
- C‑section scar feels stuck months later: pair gentle abdominal lengthening with daily silicone and 5 minutes of scar massage. If pulling persists, ask for a pelvic PT referral.
- History of keloids: keep tension low, protect from friction, and talk to dermatology early about silicone and pressure therapy.
Troubleshooting (what to change when something feels off)
- After stretch, the scar stays red or angry for hours: cut hold times in half, reduce intensity to 2-3/10, and add more breaths.
- Sharp sting or zinger sensations: skip that move for a week; try a different angle or position; add gentle massage around (not on) the tender spot.
- Itch is driving you wild: cool compress for 2-3 minutes, then slow exhale breathing and a minute of soft circles around the scar.
- Swelling in arm or leg: elevate, do light muscle pumps, and ask your care team about compression and lymph‑safe yoga options.
- No progress after 6-8 weeks: request a referral to a scar‑savvy PT/OT or hand therapist. Targeted mobilizations can jump‑start gains.
Why this approach works: you’re combining the best‑supported elements-gradual mechanical load, mindful breath, and skin care staples like silicone and SPF-into a plan your body can actually follow. That consistency is what reshapes collagen.
If you remember one thing: move gently, daily, and listen closely. Your scar remodels for a long time; your steady nudges steer it in a better direction.
Key phrase to keep in mind: low load, long duration. That’s the sweet spot for scar healing.


Written by Martha Elena
I'm a pharmaceutical research writer focused on drug safety and pharmacology. I support formulary and pharmacovigilance teams with literature reviews and real‑world evidence analyses. In my off-hours, I write evidence-based articles on medication use, disease management, and dietary supplements. My goal is to turn complex research into clear, practical insights for everyday readers.
All posts: Martha Elena